Thursday, August 8, 2013

Mango Kesari Bath (Soy-free)


I don't know if you've heard - but I'm in one of the best vegan groups in the world called "Vegan Temptivists" where I was originally invited because of my Oatmilk Yogurt recipe (soooo long ago)! In it I've met so many amazing bloggers with the most TEMPTING food from all around the world and so we set up a gift exchange. Now, during that time I had just started working in a cafe (where I became head line cook, mind you ^.~) and got my first debit card! I had to buy something awesome for Somer of Vedged Out, and I knew that she was into healthy stuff so I decided to buy her some of that Sunwarrior protein powder I had been hearing about it and by chance I got Vanilla - the one that she wanted to try!
<


I got the most amazing package from Susmitha of Veganosaurus, all the way from India! It took about a month to receive it and boy was it worth the wait. I started with the crunchy snacks and the cookies and found that the coconut ones were my favorite! I also looooooved those spicy banana chips and chickpea snacks. I probably ate everything, except for the adorable jewelry in the corner, within a week with the help of my mother. All that was left was the Mango Bar, Sesame Brittle, dried fruits and the Kesari Bath. Now, I've never had kesari bath a day in my life, and couldn't read the instructions other than the information of it being a dessert - Susmitha's favorite, if I remember correctly.

So, I decided to set it up for my "cheat day" breakfast, and instead of adding water and regular oil as suggested in the instructions, I put in about a cup or two of almond milk, 1/4 of the mango package, some of the dried papaya and a few bits of the sesame brittle and let it turn orange from the sweet fruit. Then I slowly poured in the kesari bath (which is made of semolina, and seems to be sort of like couscous!), thinking I would only use half of it for now. Well, apparently that wasn't enough for my taste so I dumped the whole package in and whisked it rigorously, folded in some coconut oil cubes from an ice tray and then sprinkling on more candied papaya.

On the side I had baked some un-sweetened puff pastry twists filled with cinnamon to counterbalance the sweet gooeyness of my kesari bath.


(Mango Kesari Bath Ingredients)

  • 1 & 1/2-2 C. Cold Almond Milk
  • 1 16 oz package of Kesari Bath
  • 6 tbl Chopped Dried Mango
  • 1 tbl Cold Coconut Oil
  • 2 tbl. Minced Sesame Brittle
  • Candied Papaya

(Directions)

Start your almond milk in a pot and add in the mango immediately, stirring once in a while so nothing sticks or burns, then whisk in one part sesame brittle and some of the candied papaya, however much you like. Once your milk has turned orange and the mango melts, slowly whisk in your kesari bath and allow it to thicken, only just before it is the "right" consistency for you but make sure that it is fully cooked and not too hard or grainy. Fold in your coconut oil and the rest of your brittle and top with candied papaya. Enjoy!


Fun fact:Mangos contain 100% of the daily required Vitamin C, 35% of Vitamin A and 12% of fiber!

Tuesday, July 9, 2013

Animation Night Cookies

Hey all! Its been a while, hasn't it? I've been soooo busy with stuff for college, my job, my internship and most of all, me-time! I'm learning a lot about myself but most importantly I'm learning how to truly live my life and I'm so proud of myself and so happy to be surrounded by such amazing friends that are helping me get to my dreams, and accepting me for who I truly am. Those same friends are the ones who I made these cookies for! I rented a bunch of DVD's and these movies probably took about three hours, not including drying time overnight. They love them!

I've used a similar recipe before for my Christmas cookies but this time I used a total of five cups of flour which consisted of four cups of cake flour mixed with one cup of all-purpose and they were so soft! A few cracked, but I found that if I let them cool on the pan and firmly placed my spatula underneath the main structure of the cookie, it could come out perfect. The first batch (all square cookies) I over-cooked a little but I let them sit for a day before icing them whilst the two cookies at the bottom were under-cooked a little and then frosted within an hour of cooling. The under-cooked ones were my favorite! Kind of like lofthouse style cookies!

 I totally forgot to pop a lot of the air bubbles but I think they turned out fine - plus these were super fun! As you can tell - I'll be doing MANY more sugar cookie batches.

Extra-soft Sugar Cookie Recipe:
2 C. Medium-Hard Coconut Oil
1 & 1/2 C. Powdered Sugar
4 tsp. Vanilla Flavoring
4 C. Cake Flour
1 C. All-Purpose Flour
4 tsp. Baking Powder
1/2 tsp. Salt

Makes about 2 dozen medium-large cookies.

Cream your sugar and coconut oil together with your flavoring, sift together the rest of the ingredients and then wrap in plastic wrap and place it in the fridge while you spray a baking pan and preheat your oven to 400 degrees, and then roll out your dough to about 1/4-1/2 an inch thick, then cut into preferred shapes and bake for about 5-7 minutes or until cooked to your liking, try not to let them brown as they will continue to cook afterwards. Let them rest, then get to icing!

That recipe is right here -

http://shinsveganloving.blogspot.com/2013/01/a-very-zombie-christmas.html

As for the cookies above - here's their movie list!

Top: "My Neighbor Tototo", "Coraline", Ponyo"
Bottom: "Spirited Away" (Soot Sprite and Round Cookie), "Howl's Moving Castle", Inuyasha
*Not Pictured: "Princess Mononoke"

Enjoy!

Sunday, March 31, 2013

Peanut Butter Protein Bites for Easter (Soy-Free, Gluten-Free, No Added Sugar)

Happy Easter, everyone! I don't really celebrate it - but when I did my Easters were filled with Cadbury eggs, bunny-shaped cakes and Chinese takeout on a picnic blanket. It was a little personal celebration between my mother and I as I'm the youngest in the family and the only one living at home, and it filled me with glee to decorate butterfly masks and watch old movies with her as we ate the treats. We never actually took the picnic blanket outside, and instead opened all of the windows and turned on the fans whenever it rained into our living room as we decorated the Easter eggs or took the time to unfasten the VHS tapes from their sticky, suctionny packages.

It still makes me happy to think of that and I hope to do that one day with my own children (if I have any).

Although I don't celebrate it as we used to, these treats are too cute to pass up! They're simple, sweet and easy to share.


(Peanut Butter Bites Ingredients)

  • 1/3 C. of Peanut Butter
  • 2 scoops of Vanilla Protein Powder*
  • 2 tbl. Melted Coconut Oil
  • Melted Chocolate
  • Your favorite Icing
  • Rice Krispie Cereal for rolling

(Peanut Butter Protein Bites Directions)
  • Roll your peanut butter, oil and protein powder together and place in the freezer. Once hardened, shape into eggs with your hands and two spoons.
  • Roll in the rice krispie treats and freeze once more.
  • Decorate and freeze.
  • Serve and enjoy!


* I use Sunwarrior Vanilla Protein Powder

Friday, March 29, 2013

Peanut Butter Protein Pudding

I freaking love this pudding - its super simple to make and after pumping iron in the gym and running around...its a great pick-me-up! It reminds me of that delicious Reese's Peanut Butter Cup filling without all of the nastiness, and it only requires four ingredients (three if you don't want to be fancy). So, let's get started!


(Peanut Butter Pudding Ingredients)

  • 1/4 - 1/2 C. Peanut Butter
  • 3 Scoops of Vanilla Protein powder
  • 1 tsp. of Vanilla Extract
  • 1-2 C. Non-dairy Milk

(Directions)
  • Simply add all of your ingredients together, adding the non-dairy milk last and blend. Place straight into a container to eat or refrigerate and have delicious pudding!


Saturday, February 16, 2013

Guest Post by Pam Johnson

Here's a new guest post with a slightly different opinion and view on the vegan-vegetarian lifestyle by Pam Johnson.

If you wish to contribute your own post - be sure to hit "Contact Me" up on top! Otherwise, enjoy.


All About the Healthy and Economical Vegan Regimen

In today's world average people are granted an unprecedented level of food options. While some can get bogged down in the multiplicity of choices and waste time and money on unnecessary products (e.g., gluten-free crackers), others solder science to economics and seek nutritious foods at affordable prices. What's important to remember is that eating affordably should be coupled with modern science.

Food Pyramid
Alongside the World Health Organization, modern nutrition calls for a balance of fats, carbohydrates, and proteins. Did you know that you can die without protein or dietary fat? This explains why people on low-carb ketogenic diets or vegetarian diets low in sugars do quite well. The rest of this article will focus on eating vegetarian diets affordably and how to couple convenience with nutrition while eschewing meat products.

Levels of Veggie
There are many layers to becoming a vegetarian, oftentimes embodied in one person's experience from all meat to zero meat diet regimens. There are some vegetarians who just avoid meat and still consume eggs and fish. While this affords some vegetarians more protein and essential fatty acids, it isn't the full-throated vegan lifestyle. Full-bore vegan diets eliminate meat altogether with an eye towards the detrimental health and environmental impact of meat consumption.

Health and Economics of Going Vegan
Some people go vegan for other reasons though. For instance, a low-fat vegetarian diet has been linked to a decreased risk of numerous degenerative diseases. For instance, subscribing to the vegan diet lowers one risk for the following ailments, many of which are crippling to Western man: coronary heart disease, diabetes, cancer, kidney disease, osteoporosis, and late-onset diseases such as Alzheimer's and dementia. In fact, Time Magazine recently came out with a study showing that low-fat vegetarian diets are incredibly affordable and nutritious. A controversial finding in that study showed that regular grocery store vegetables rivaled the upscale Whole Foods-like "organic" foods in quality while sidestepping really breaking open the piggy bank. For this reason, budding vegans would do well to corral in the good deals in their local freezer department!

Veganism for All Life's Trials
The vegan diet has been shown to be affordable, safe, and even appropriate for different ages and life stages. For instance, modern studies show that veganism is apt for kids, pregnant women, and lactating women alike. Those who choose to avoid meat consumption have been shown to hold lower body mass indexes. Alongside this health boon, vegan subscribers are at lower risk for cholesterol or vascular problems.

Prescription for Health
The ideal thing to do is go to the grocery store and pick up rice and beans, which allots protein, or go for an affordable veggie dish like bok choi, which supplies calcium and other minerals. Veganism is not only a healthy diet but it can be employed long-term and cheaply in today's society!

Author Pam Johnson has been a vegan for 6 years because of all the health benefits, as she is in the healthcare field. She also enjoys blogging and is a contributing writer for Top 10 iPhone Apps for Healthcare Professionals

Monday, January 21, 2013

"The Vegg" Vegan Egg Yolk Review


You've probably heard of the Vegg (pronounced like "egg" but with a 'V') even if you aren't a vegan blogger or egg-replacement aficionado. The purpose of the Vegg is to replace the actual egg yolk instead of the whole egg and not only imports the slightly eggy flavor into whatever you like - it also has a beautifully golden color like an egg yolk. The flavor is very slight, at least to my tastes when I used it in my vegan omellete but I could smell it a bit better in my yellow cake recipe.

I thoroughly enjoy the packaging and the way the whole thing sent to me was in a beautiful brown envelope, containing the big Vegg packet and information cards. The mascot on it is adorable and its very easy to tell what type of product this is!

The Positive: It only takes a very small amount of the Vegg to make the equivalent of two and a half egg yolks (about a teaspoon) and the package can make up to 40 average "yolks". All of the ingredients are common and pretty well known - two components are added for color, the nutritional yeast (which is also added for taste, I presume) and beta carotene for a more golden color.

Plus, every 2-3 yolks are only about 10 calories and the product is free of (high) allergens! Can't say that much.


The Negative: It can be a bit pricey, depending on the shipping cost and the location that you're buying it from. You also have to be sure to have a blender because it will not turn out right if you try to hand-mix it, as demonstrated on the package.

I've found that I've also need to add cornstarch to the water and Vegg so it can be a bit more silkier and stronger for all of my needs.


Image from "Meshell in the City" http://meshell.ca/
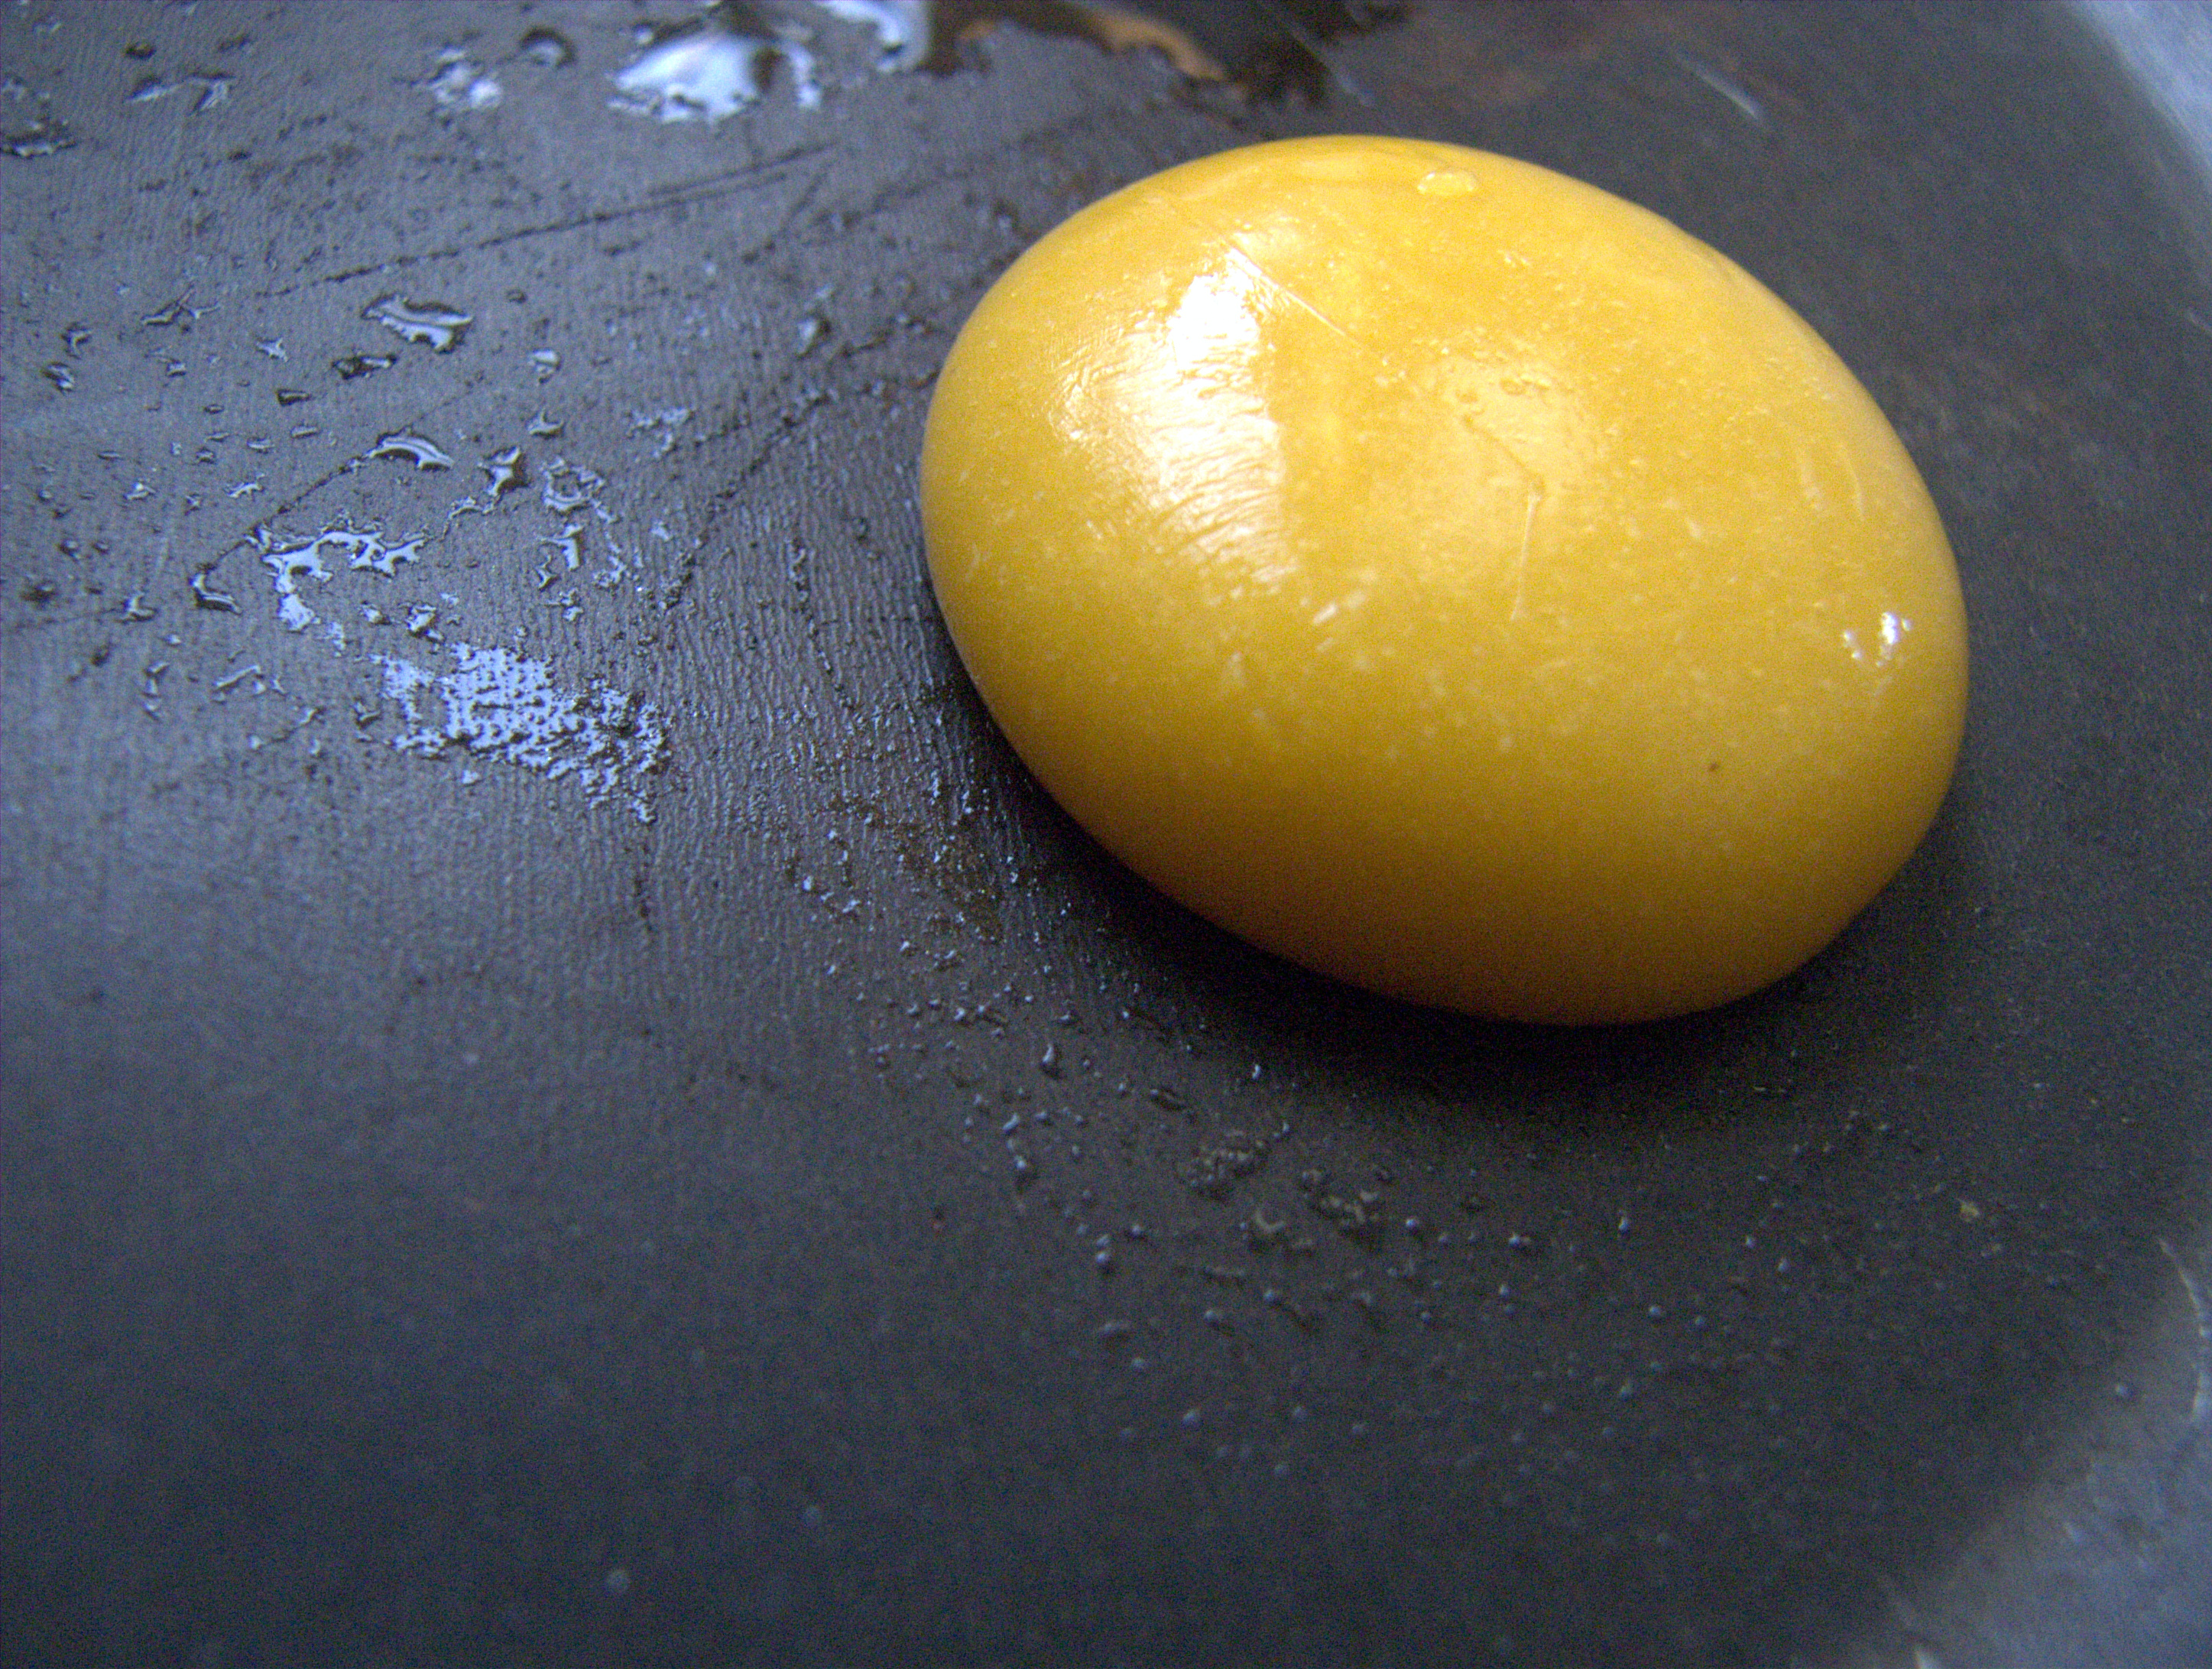
The Interesting: The Vegg contains "sodium alginate" and if you're familiar with molecular gastronomy or just enjoying seeing spherical shapes on your dinner plate at a fancy restaurant, you'll be happy to see that this very ingredient aids in gellifying your yolks and if you place it in a calcium lactate bath - you'll have a gelatinous, ooey gooey and good for the Earth egg yolk! Just pop into your favorite molds (maybe a Hello Kitty one?), freeze and make your calcium lactate bath, then you can dip bread into it or meld with some delicious tofu egg whites for an amazing fried egg.

For flavor and the signature egg taste (brought on by sulfuric compounds) - an Indian black salt is used. Isn't that neat?

Here above you can see a picture of a spherical Vegg yolk! Isn't that exciting?


Average Price: $7.00

Price I Paid: Free for a review.
Despite it not having the huge strengths in taste and smell you would expect from an egg yolk, its a huge step and I would most definitely buy this product again and suggest it to all of my friends. Plus, its especially helpful when making such moist yellow cake!

Here's a link to where you can buy "The Vegg" but there are plenty of retailers around!

http://shinsveganloving.blogspot.com/2013/01/vegan-yellow-cake-recipe-soy-free.html 
Link: http://www.amazon.com/gp/offer-listing/B0085V3YFO/ref=dp_olp_new?ie=UTF8&condition=new


Saturday, January 12, 2013

Vegan Yellow Cake Recipe (Soy-Free)

Have you ever heard of "The Vegg"? Its a product that I've been using for a while this month and that I really like. Its meant to replace the egg yolk in most recipes and while yellow cake varies in amounts - its generally pretty high. I've found that "The Vegg" works excellent in replacing the egg yolk and that I can easily strengthen it by combining it with cornstarch. This cake ended up being really moist and great despite my oven having to be at 400 degrees for about an hour to cook anything now.

(Vegan Yellow Cake Ingredients)
  • 1 C. of Coconut Oil
  • 2 C. of Raw Sugar
  • 2 tsp. Vanilla Extract
  • 2 TBL. Cornstarch
  • 1 tsp. of The Vegg
  • 1/4 C. of Cold Water
  • 2 tsp. Baking Powder
  • 1 C. Non-Dairy Milk + 1 TBL. Apple Cider Vinegar

(Directions)
  • Cream your coconut oil with the raw sugar then add in the baking powder and vanilla extract.
  • Blend your cornstarch, vegg and the water together in a blender, then cream it into your oil and sugar.
  • Alternate with your flour and milk and fold/stir them together
  • Preheat your oven to 350, spray and line your pan with parchment paper
  • Bake for about 30 minutes or until fully cooked, allow to rest and then frost with your favorite frosting recipe or use a chocolate fondant like I did!

Enjoy!

Tuesday, January 1, 2013

A Very Zombie Christmas

Hey all! I hope you've had many great holidays and a vacation! I'll miss being able to make so many yummy and fun treats at home but I can bring this to work with me and hopefully help sell a lot! While I do plan on making some stevia-cookies and showing off my stevia powdered sugar, I just wanted to do something a bit "rebellious". These cookies were excellent and the whole recipe makes about two dozen cookies so you can use anything you like. Also - a little tip, when someone suggests only a tiny amount of black food coloring gel...please believe them!

(Sugar Cookie Ingredients)

  • 1 & 1/2 C. Powdered Sugar
  • 3/4 C. of Coconut Oil
  • 1 tsp. of Vanilla Extract
  • 2 & 1/2 C. All-Purpose Flour or Whole Wheat Pastry Flour
  • 2 tsp. Baking Powder
  • A pinch of Salt
  • A few dribbles of Non-Dairy Milk (I used flax)

(Directions)
  • Cream your coconut oil with the powdered sugar then add in the baking powder and vanilla extract.
  • Fold in your flour and knead until it is like a store-bought cookie dough.
  • Refrigerate for about 10-15 minutes, cut in half then roll out your cookies.
  • Preheat your oven to 350, cut your cookies out onto some greased parchment paper and bake for about 10 minutes or until sturdy but not browned.
  • Allow to cool and then prep your vegan royal icing.


(Vegan Royal Icing Ingredients)

  • 1 TBL. Cornstarch or Tapioca Starch
  • 2 TBL. Non-dairy Milk
  • 1/2 tsp. Clear Vanilla Extract
  • 2 & 1/2 C. Powdered Sugar
  • Preferred Food Coloring.

(Directions)
  • My bowls were wet from washing each time I made the royal icing but just add in a few dribbles of milk to your cornstarch and mix. It should resist a bit.
  • Alternate your powdered sugar and milk until you get a thick consistency. Lift a spoonful up, then drip it out of the bowl. It should take 10+ seconds to complete for an outline.
  • Outline your cookies and let it take an hour or so to dry, then add more liquid to the icing to just barely thin it and then flood your cookie. Decorate with more outline/piping icing and allow to dry for 5+ more hours if you can wait.

Related Posts Plugin for WordPress, Blogger...